

I am a sim racing driver, presenter, video editor, writer, and commentator… Basically all things sim racing!
As well as writing for SIMRACINGCOCKPIT.GG, I’m currently producing YouTube videos over at Race Anywhere, having spent the last three years working on the Traxion.GG project.
Featured image: a Ginetta in Full Drift
Automobilista 2 is Sim Racing’s perennial dark horse.
Despite the running narrative questioning just how ‘hardcore’ this sim is, there’s no denying it’s an incredibly accomplished title. Superb graphics, a plethora of interesting and rare cars and circuits (including an array of historic content not seen elsewhere), industry-leading dynamic weather, and VR integration are just some of its strengths.
It’s very much a ‘pick-up and play’ title; you can be out on circuit racing AI cars within minutes. However, it’s all too easy to fall into the trap of settling for how it’s initially presented to you. In reality, there are simple steps you can follow to improve your Automobilista 2 (AMS 2) experience and maximise its ever-acknowledged potential. These will iron out some of the perceived weaknesses, whilst simultaneously boosting the existing strengths.
Finding Your Bearings
Let’s start immediately with a fresh install of the game. Ensure your peripherals are set up, and launch the associated wheel software (your wheel controller / calibration setup software), ensuring rotation is set to ‘Auto’. If your wheel doesn’t have this option, setting it to its maximum should do the trick.
Then, launch the game.
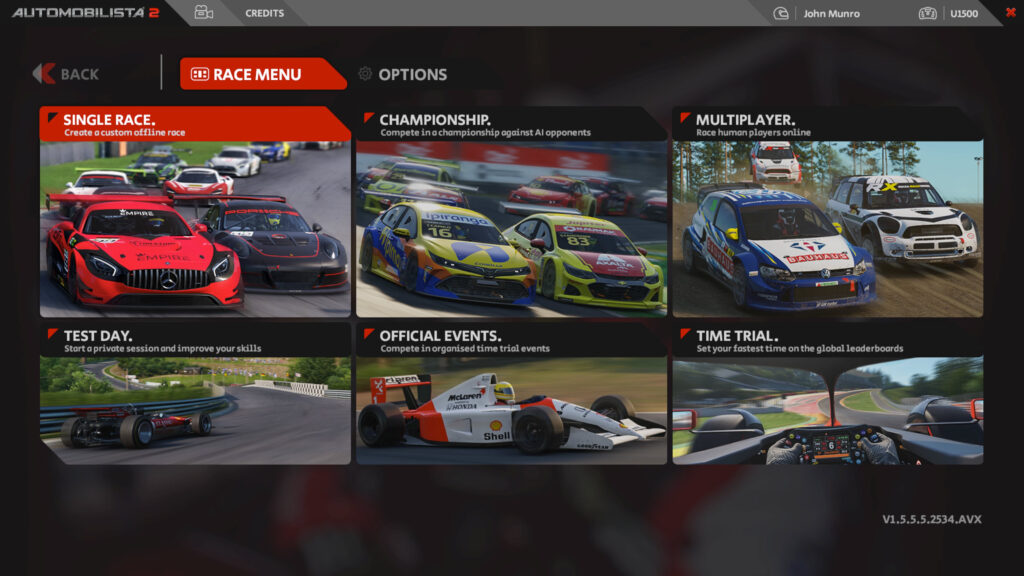
There are two main menu types: ‘Race Menu‘ and ‘Options‘. ‘Race Menu’ features six gameplay modes, consisting of three hot-lapping modes and three racing modes. ‘Time Trial‘ and ‘Official Events‘ are you versus the world in various car and track combinations, with ‘Test Day’ providing a frivolity-free practice session… The perfect playground to get things set up properly (as I will get to shortly).
Then we have the racing modes. Multiplayer allows you to race others online or create your own custom lobbies, whilst ‘Championship’ facilitates a fully-fledged offline AI season in a series of your choice. Finally, ‘Single Race‘ lets you create a fully customised offline race weekend.
Outside of the ‘Race Menu’, you find a regular-looking ‘Options‘ tab with the usual set of sub-menus which we will delve into throughout this guide. Along the top of the screen, you will see game credits, a saved replay tab (signified by the video camera symbol), and your personal profile tab towards the right which can also be selected.
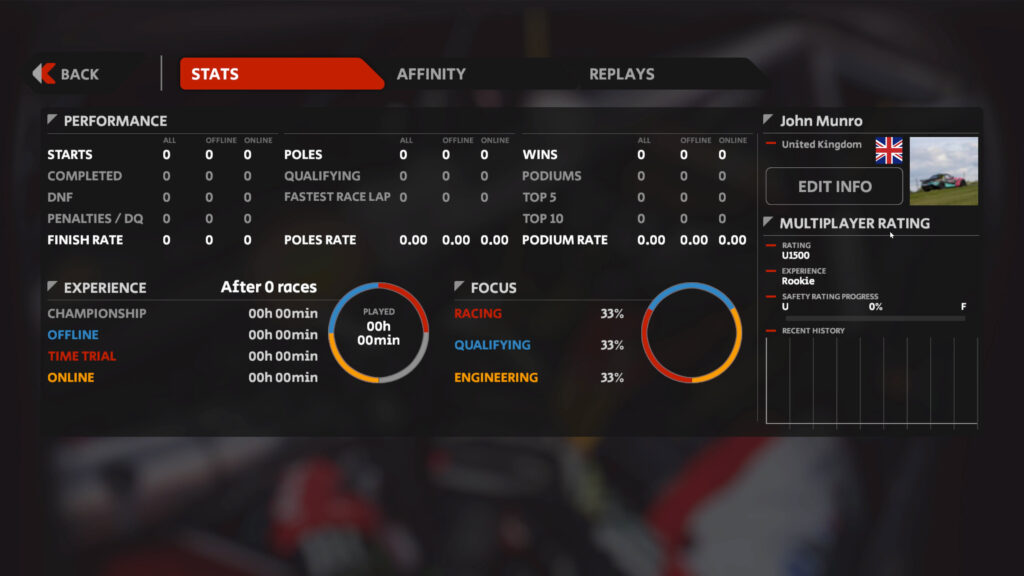
Within this lies your performance stats, experience level, multiplayer rating, content affinity, and the ability to edit your name and nationality.
First Steps
There are two things I would recommend doing before jumping into your car for the first time. Firstly, head to the ‘Options’ tab and click on ‘Performance’. Make sure your refresh rate and resolution are maximised for your particular monitor.
This is also a chance to check your graphic settings for the first time, and unfortunately (as there are so many variables at play depending on your hardware), I can’t tell you exactly what will be optimal for your situation. What I can recommend, is starting on the lower side to ensure a solid and consistent frame rate of at least 60 FPS, and as you play the game you can nudge the visual quality up to find that sweet spot before any noticeable performance drops.
If you end up struggling with your frame rate, consider lowering your reflections, environment map, and shadow detail. This is something you can fine-tune with races under your belt.
Secondly, assign your basic controls. Select “User Set 1“, rename it for future reference, and change your controller type to ‘Wheel‘. I would then recommend setting your make and model to ‘Custom‘ if you are using a direct drive wheelbase and any independent peripherals. Before calibration, you need to configure your basic controls. For now, just assign your steering controls, pedals, gear up and gear down.
It’s now time to head into the ‘Test Day’ mode and fire up your first session, within which we are going to sort many of the remaining options.
One quick tip at this stage, if you want a consistent and static grip level out on the circuit instead of a constantly evolving realistic grip level, head into session settings before you start and change the ‘Livetrack Preset’ from ‘Default Progressing’ to ‘Heavy Rubber’.
The Opening Lap
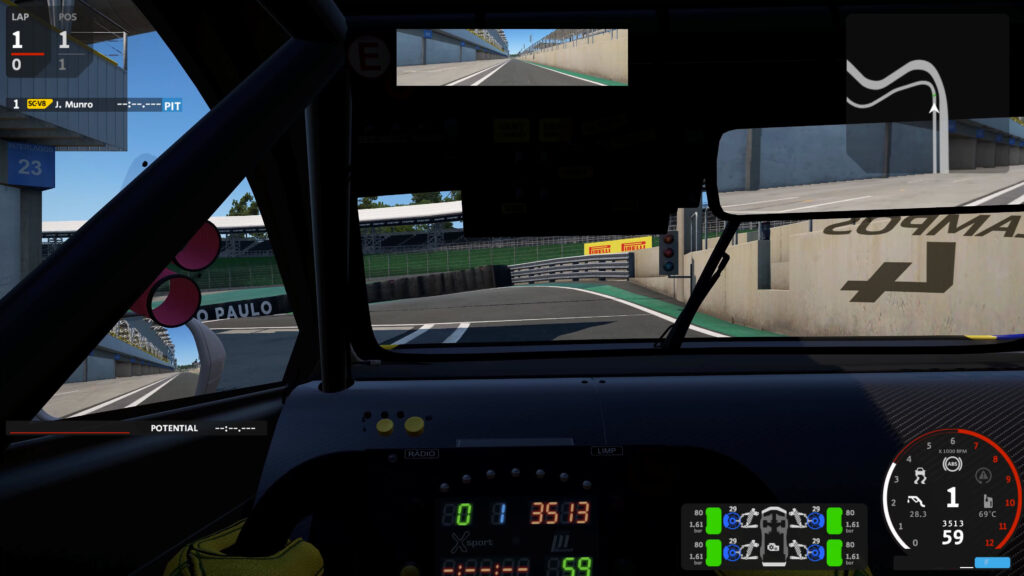
So it’s time to hit the circuit! For me at this stage, the game was instantly looking reasonable, and my basic controls were working, but my steering rotation was all wrong. Hitting escape brings up the pause menu, from which you can select ‘Options’. This is where you are going to be adjusting things throughout this guide. Now you can calibrate your wheel and pedals properly, and for me with my Fanatec DD Pro’s rotation set to ‘Auto’ in the Fanatec software as mentioned earlier, I ended up with a steering range of 100 and a lock of 1080 degrees.
Moving along from ‘Control Scheme’ to ‘Configuration’, my next port of call was to reduce the deadzones. These are helpful if your pedal inputs aren’t fully clean, but for me, this wasn’t an issue. I’d recommend leaving sensitivity settings at 50.
I’ve found that these rotation settings and the subsequent calibration have resulted in a perfect 1:1 steering ratio and the correct rotation limit for every car I jump in, meaning I never have to change any rotation settings moving forward.
Check this to make sure it’s the same for you!
The fundamentals are now taken care of, but a little more time spent refining certain settings will result in an improved look and feel as well as better functionality and an overall superior gaming experience. Let’s start with the look, shall we?
Improving Your Graphics
Stylistically, your hardware-dependent graphics settings will of course influence how the game looks for you. But three other crucial visual elements will affect things on a more practical level.
Firstly, head to the ‘Camera‘ settings within the ‘Options‘ menu, then click on the righthand ‘Movement‘ tab. I would recommend turning high-speed shake off, turning head movement down to 10 (or 0 if you prefer), and generally lowering or disabling your G-Force effects.
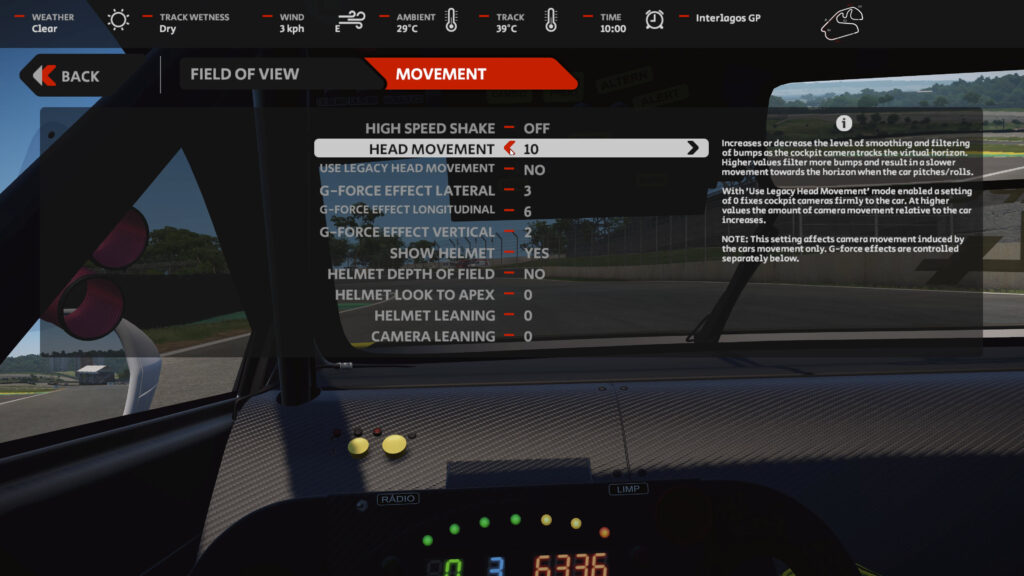
If you, like many others, want a fully rigid camera for that pure sim racing experience, turn on your ‘Use Legacy Head-Movement’ option, and turn all G-Force, shake, and movement settings off entirely.
The second element is your field of view setting (FOV), which can be changed using the left tab. There are many resources out there (including simracingcockpit.gg!) if you want to learn all about what FOV means, how to set it properly, and why seeking a ‘correct’ FOV setting can help your driving, but if this isn’t a high priority for you, I’d recommend leaving it on the default setting.
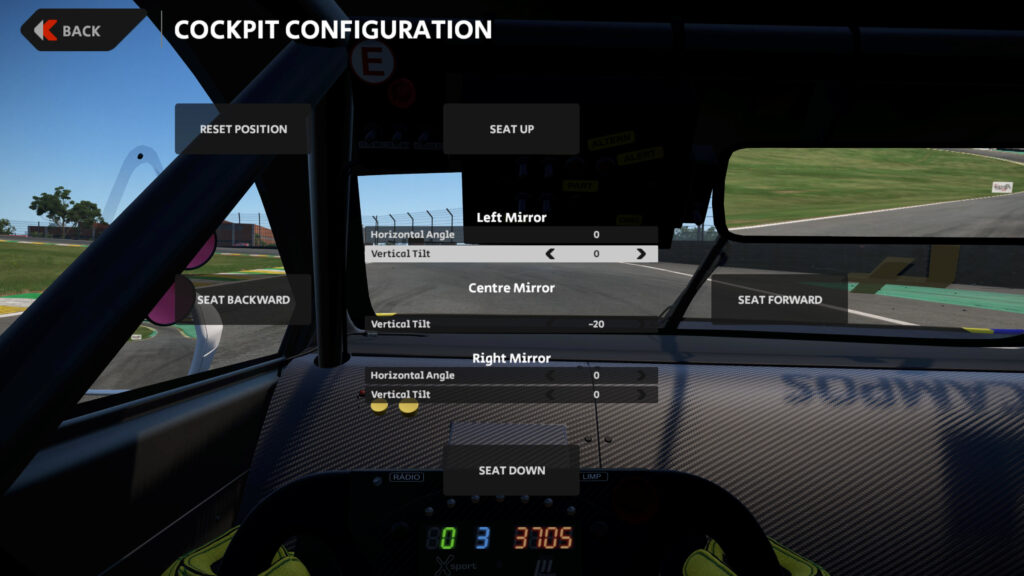
The final adjustments you are going to make can be found in the ‘Options’ menu, under ‘Cockpit Configuration’. This tool is similar to that found in RaceRoom Racing Experience; simply move the seat position to suit your requirements.
I tend to raise the height slightly for an improved vantage point and a higher likelihood of hitting apices… All the advantages of being tall without the extra weight or lack of headroom! Remember that you may have to do this differently for each car you drive.
Improving The Feel
With the graphics sorted, now we want the feeling to match. It’s time to look at your force feedback settings (FFB). There are three FFB modes: Default, Default+ and Custom. AMS 2 allows a few individual setting adjustments in-game, but most of the intricate details are hidden within a .txt file to avoid overwhelming the user. Just remember, there are many variables at play when deciding FFB settings: different wheels, power outputs, local settings, personal preferences, etc.
Even if two people have the same wheelbase, they might run different profile settings, or simply have different preferences.
The official Reiza Studios Forum is a great resource for information. If you are struggling with setting up a specific piece of hardware or want a detailed understanding of what each setting does, that information will be available via the Forum.
Using a Fanatec DD Pro with the 8nm Boost Kit and standard Fanatec software settings, I prefer the feeling of Default+, which gives additional chassis feedback, drivetrain pulses, and more beyond the default preset. If you want to keep things simple and don’t feel comfortable messing around with files, try this.
However, I use Custom instead of the Default preset, which requires a bit of preparation.
Custom allows the user to change the hidden settings via a .txt file in the game directory. With a little bit of research, I stumbled across a highly recommended custom file on Page 349 of Reiza’s custom FFB forum, Joaquim Pereira’s ‘FullFFB by JP’.
I moved this file into the game directory (which for me was found in Documents > Automobilista 2) and then renamed it “ffb_custom_settings.txt”. Then, by changing your in-game FFB setting to custom, this file will take effect. This gave me a stronger connection to the road through the wheel.
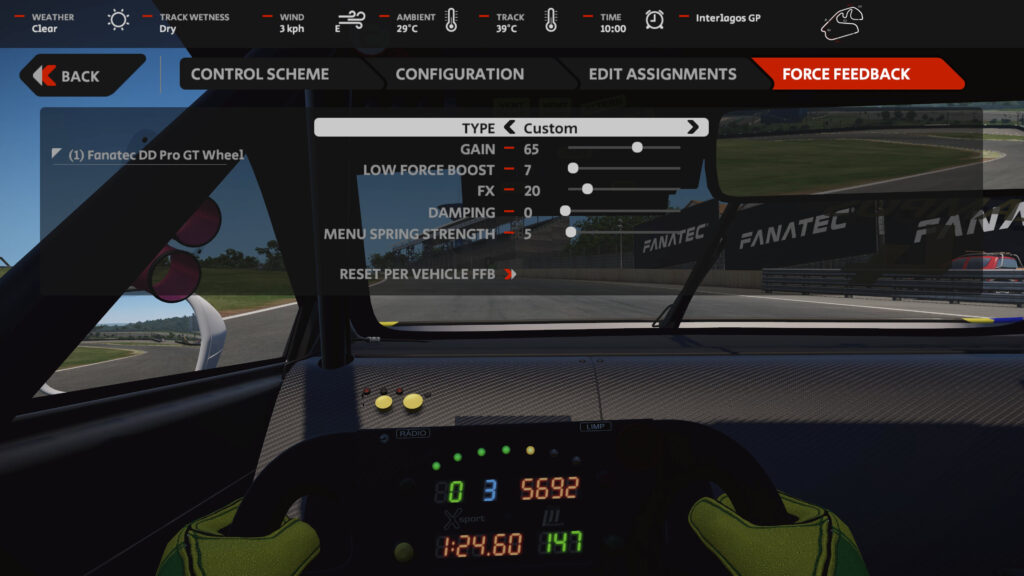
Then, after picking your mode, play with the other in-game settings to find your personal preference. I recommend damping at 50 for the DD Pro when using default+, whereas with custom I have it down low or even off. I would again suggest using Reiza resources to your advantage… There will likely be a guide for your specific wheel, whilst some wheel manufacturers have their own recommended settings for the game on their website or within the software itself.
With FFB sorted, turn to the ‘Gameplay Options’. Don’t be afraid of using the extra driving assistance whilst you find your feet. ‘Steering Assist’ and ‘Braking Assist’ in particular, however, should be kept off.
The best settings for ultimate immersion would be to set ‘Driving Assists Allowed’ to ‘Authentic’, as this matches the real settings of the car you are driving. This allows you to adjust Traction Control and ABS settings from within the car if said car has the option, using the ‘In-Car Management‘ tool (more on that shortly!)
You will also notice many options are greyed out at this stage, and again we will come back to this.
A final tweak that you can make is within the ‘Audio’ settings (hear me out). I like to turn down the ‘Tyre Volume‘ setting to 20, as generally on AMS 2, tyre noise is exaggerated and can break immersion. Weirdly, you might find this affects the feeling of the car underneath you… The human brain is a strange thing.
Functionality
It’s time to finally revisit the control assignments. Head to the ‘Controls’ section of the options menu, then click ‘Edit Assignments’. You should see 5 different tabs from ‘Motion’ to ‘Game’, so we are going to work from left to right, starting with the essentials.
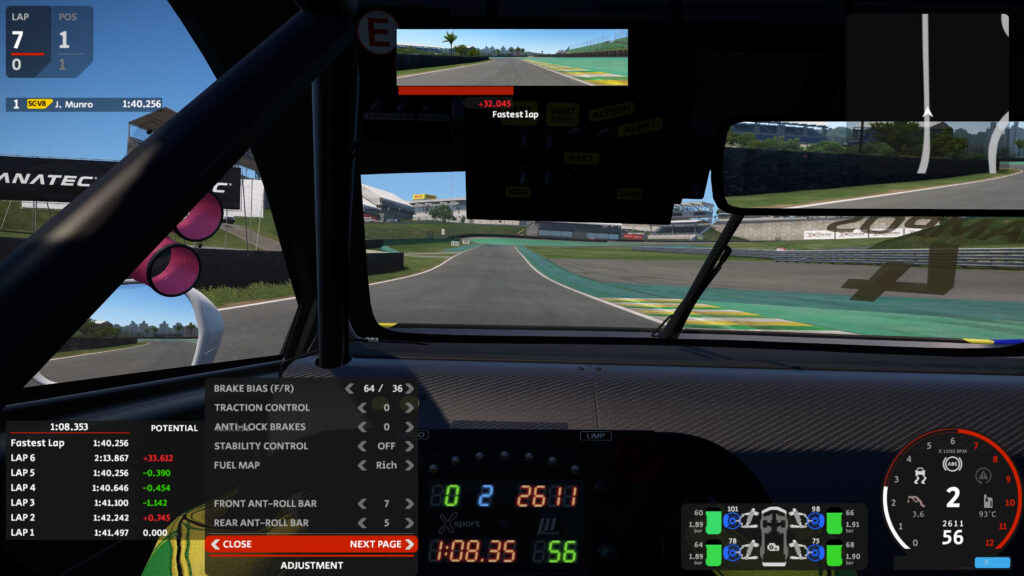
By this point you should have everything sorted for ‘Motion’, so under ‘Vehicle’, assign buttons for DRS and Pit Limiter. Move to the ‘Camera and View‘ tab, assigning buttons for Cycle Camera and Look Back, Left, and Right. In ‘Game‘ you want controls for Pause and all the In-Car Management options down to ICM Cycle. Most of these are self-explanatory, but the ICM options are crucial for changing settings whilst driving without needing button boxes and an extra set of eyes. You can adjust Brake Bias, Traction Control, and Fuel Maps amongst other things, plus a second page brings up a Pitstop Menu. All of these things can be individually assigned too, so if you want instant access to any particular changes and have the buttons at your disposal, use them!
Moving on to optional assignments, for maximum authenticity assign buttons for Ignition, Start Engine, Headlights, and Windscreen Wipers. These can be automated via gameplay options when you eventually return to the main menu. You can also assign a Launch Control button that may come in handy for getting off the line well in certain vehicles.
My final two recommendations would be HUD View and Split Times, found in the ‘Game‘ tab. The former allows you to switch between different HUD styles showing different information, whilst the latter changes the format of the live relative lap timer found below your virtual mirror.
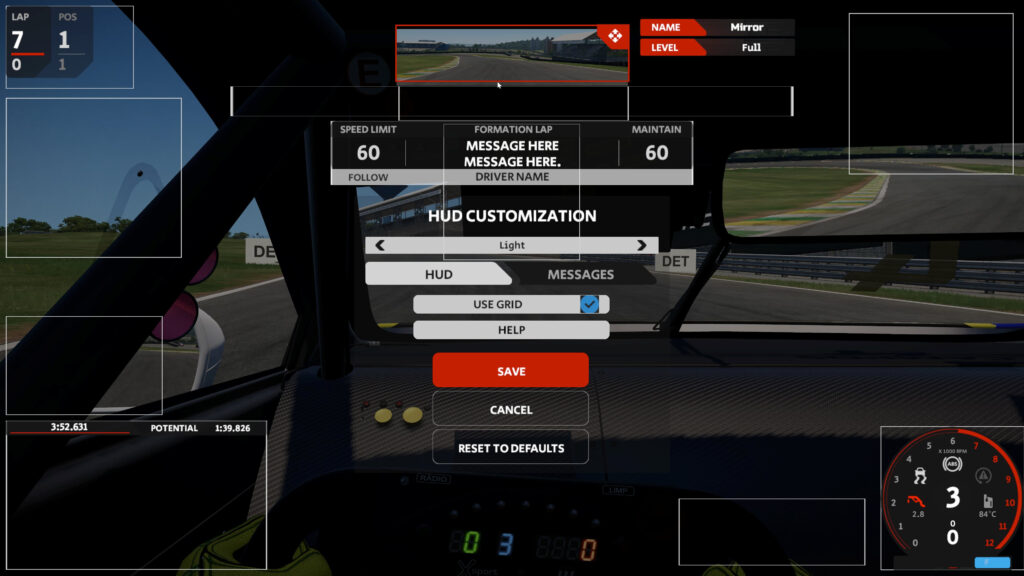
If you would like to take your HUD customization further, you can do so through ‘Edit HUD Layout‘ within the ‘Options‘ menu. I would start with the default settings until you familiarize yourself, but down the line, you can tailor this to show you the information you need, where you need it, without the fluff. Some settings here will only really apply to a race session…
In fact, at this stage, I would argue you have done all you can in ‘Test Day’ mode. Get a few laps in to make sure you are happy with things. You have earned them after all!
Tweaking your Overall Gameplay Experience
Exit your session and head back to the main menu, because now it’s time to sort your race-related settings. Now is a good opportunity to adjust any ‘Visual FX‘ and ‘Performance‘ sliders as well, remembering that wet weather and AI opponents may reduce performance further.
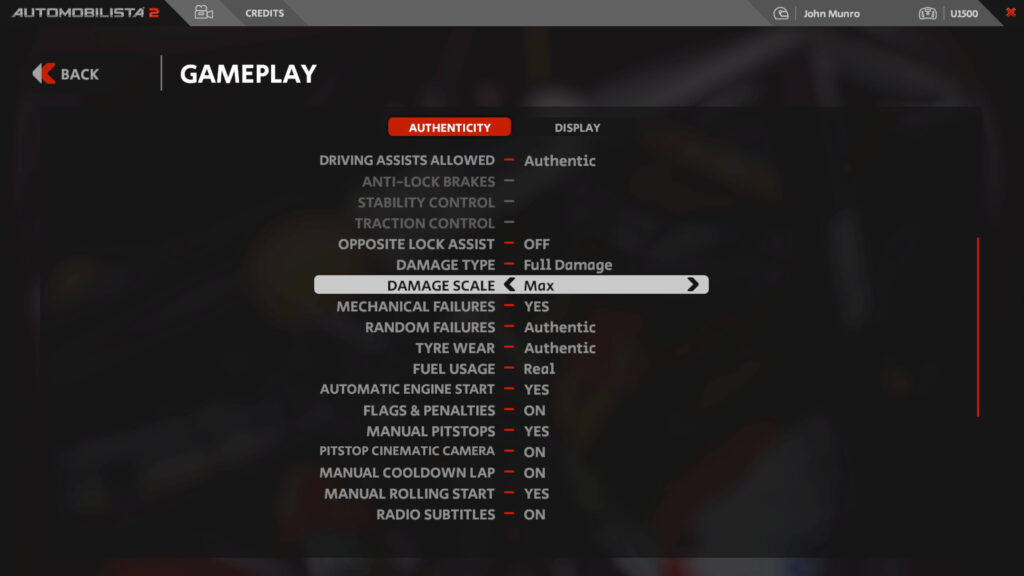
When changing your ‘Gameplay’ settings from the main menu, you will notice that more options have now been unlocked. We have the likes of Damage, Mechanical Failures, Tyre Wear and Fuel. As mentioned previously, it comes down to authenticity and immersion versus practicality, so choose accordingly.
A second tab will reveal additional display settings, and after switching off the ‘Driving Line‘ and ‘Turn indicator’, the rest are turned on. I like to know what’s happening directly around me as I often race on a single monitor, so having pitstop cues, safety car information, and virtual starting lights ensures I don’t ruin my race over something trivial.
With that sorted, let’s set up our first race. It’s going to take time to find the ideal AI level for you, but I would recommend starting with aggression set to ‘High‘ or ‘Max’. Max is great for immersion but can be frustrating at times as you will occasionally be forced off-circuit (like in real life).
‘Opponent Skill Level’ is a case of trial and error, requiring time to refine. One tip is to start lower than you might expect; The AI opponents on AMS 2 can be surprisingly strong, particularly in changeable conditions, so don’t underestimate them early doors. Also, using a setting higher than 80 will allow the AI to use custom car setups, which brings me to another quick tip…
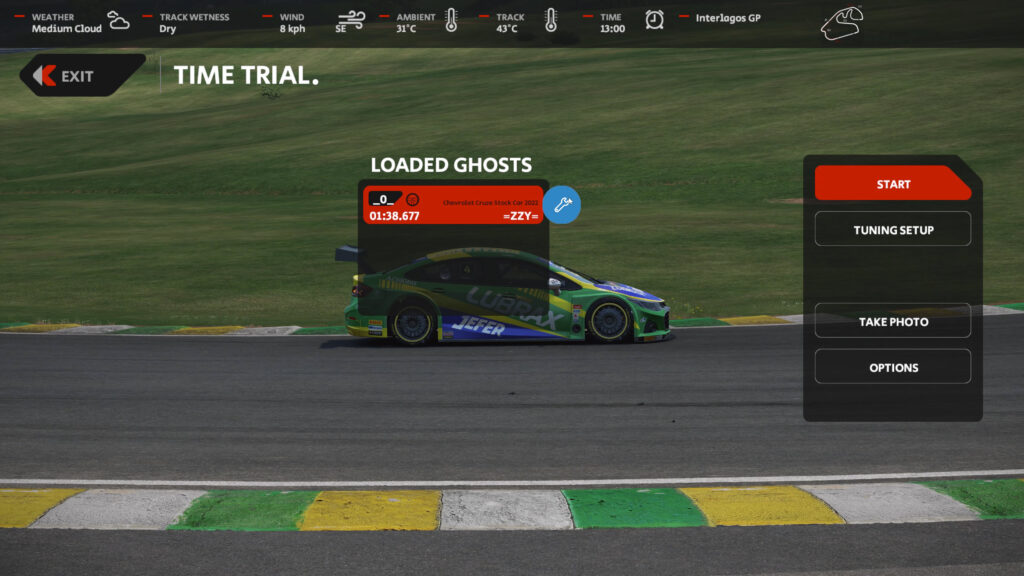
If you want faster setups but don’t have the setup-making skills, head to ‘Time Trial‘ Mode. Select the car and track you are looking for and add the record-holding ghost for your vehicle. Once in the session itself, hover over the loaded ghost and click on the spanner that appears. This will load the setup they used to set the lap time, which you can save for future use (if it’s any good…).
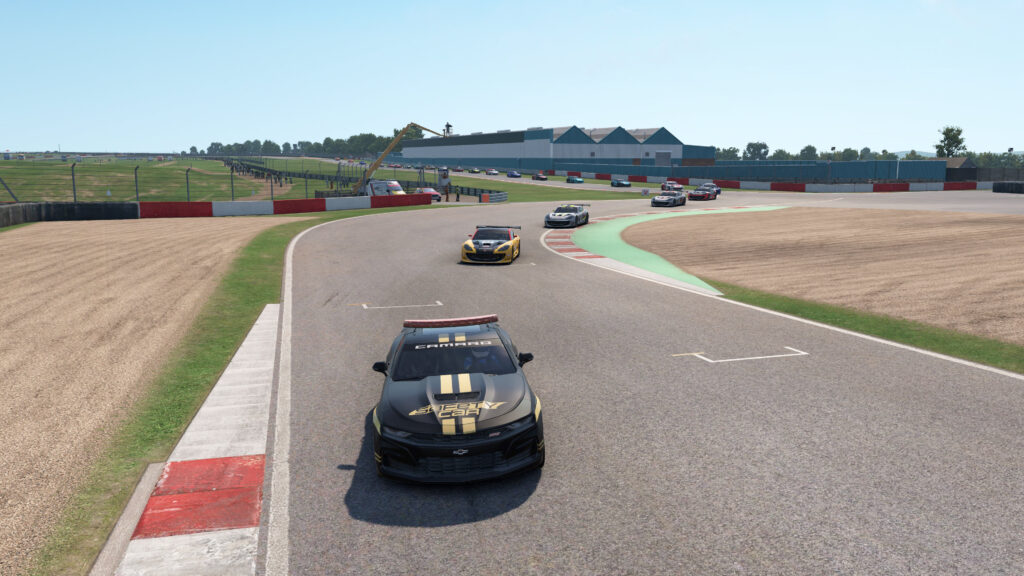
Back to the first race session, I went for a car and circuit I knew well, the Ginetta GT4 at Donington Park. This gives you less to learn and a more accurate gauge of the AI level required. I went with max aggression and 100 skill level, which for me (with prior AMS 2 experience), was ideal to get my eye in again. The opponents sometimes behave strangely at this difficulty level, namely experiencing unnaturally high grip levels at certain moments, as if they are on rails. This is better than it used to be, however, as Reiza has continually improved AI behaviour over the years. It’s now more often than not a superb race in store, which gives you the feeling of racing against real drivers with ambitions to hold you at bay.
And if you want to watch it all back, make sure you remember to save the replay. To do this, complete the race (or skip to the end if you have retired) and view the replay. There should be a save button that appears in the top left next to the photo mode option.
With the first race under your belt, tweak your aggression and difficulty settings accordingly for an even better experience next time out.
Conclusion
Congratulations, your base AMS 2 experience is now set up and ready to go! Of course, everything in this article comes down to opinion and personal preference but hopefully, it has helped you get more out of this game than you might have otherwise. If you want to take things further in future, there are plenty of routes you can take with time and research.
Fancy some enhanced visuals? Have a look into filtering and ReShade. The game is also moddable, albeit not to the extent of many of its rivals. And finally, if you like ranked online racing that has a little more to it than the simplified in-game system, there are third-party ranked racing services out there for you to discover.
No matter which way you look at it, Automobilista 2 can provide you with a fulfilling sim racing experience, the extent of which is entirely up to you. Good luck!