

I’m a sim racer with a passion for Motorsport, good racecraft and the tech side of sim racing. I made SIMRACINGCOCKPIT.GG as a place to share my experiences. I hold an International Class C race licence and write for sim racing store G-Performance and Motorsport resource Driver61.com
Featured image: my sim racing PC with a Zotac RTX 4090 GPU
Build a sim racing PC or grab a high-powered pre-built machine that nails iRacing and Assetto Corsa Competizione, rFactor2 and pretty much any other racing simulator without breaking a sweat with our latest update to our sim racing PC buyer’s guide.
Sim racing has enjoyed a significant boost in popularity over the last few years, and while you do need to make a pretty sizeable upfront investment in your equipment, thankfully it’s a fraction of the expense associated with motorsport in real life. In the past few months, gaming PCs with really high specifications have become cheaper, while for the DIY crowd, GPUS are more available than they have been for a long time
What are the best sim racing PCs?
- Skytech Eclipse Gaming PC
- MPG Velox
- Skytech Prism II
- Thermaltake Glacier 360 Liquid-Cooled PC
- MSI Codex R
- Best CPU and Motherboard Combo
- Our sim racing PC build: specification
Thankfully, we’re getting past that weird place where PC components have been really hard to get hold of. We can thank that all-too-familiar story of a global pandemic and crazy Bitcoin pricing for the shortages we all know about.
It took me a good 6 months to acquire the NVIDIA 3090 GPU featured in the build we’re looking at today – but since, stocks have been very forthcoming, particularly variants of the RTX 4080s which are reported to not be selling at the rate expected by the market.

At the heart of your set-up, you’re going to need a PC powerhouse to run your simulation software. However, in the multifaceted and somewhat perplexing world of CPUs, GPUs, motherboards, and so on, it’s sometimes hard to know which parts to choose. Sim racing and gaming equipment move at such a pace that today’s equipment will be nearly obsolete within 2 years.

That’s the reason why we’ve decided to put this guide together on building the ultimate sim-racing PC to inform you about the best components for your racing rig.
Your gaming PC might also be your daily driver for work, too. So one moment you’re piloting an F1 car through the curves at Eau Rouge/Raidillon then the next, you’re building a spreadsheet for work. So, it’s important to make sure that when you decide to switch from gainful employment to running a simulator, you will have enough processing power in the tank to run your racing-game titles smoothly.
Why you need a powerful PC for sim racing
Rendering a simulated environment leans heavily on the performance potential of your PC hardware. For me personally, I love to use my equipment to its fullest. That means iRacing settings are on max, and things getting hot! Running iRacing is a walk in the park for our ultimate sim-racing PC spec, but I appreciate that it’s not achievable for everyone in the room. So, as a rule of thumb, try to acquire a motherboard, case, and PSU that will support later hardware upgrades and focus mostly on getting your hands on the most powerful GPU you can find.

There are a few golden rules worth noting in the gaming world. Firstly, you should consider pushing your limits in terms of your budget when it comes to choosing parts for your PC. When buying PC hardware, it’s good practice to invest in the future, so don’t automatically choose the cheapest part, as after a few years you might need to replace it again. If you buy with this strategy in mind, you’ll be able to upgrade economically in the future, and you should aim to purchase something that will last you at least five years, or preferably up to ten years.

Secondly, there’s the question of whether to buy a pre-built gaming PC or source the components individually and build the PC yourself. Both options are acceptable for sim racing PCs, with the main advantages of going down the DIY route being that you can decide which parts go into the build, you might be able to save a little bit of cash, and some people simply enjoy the process of putting the rig together themselves.
Apart from that, you’ll just be splitting hairs trying to find out which way is better, and the truth is, as long as your PC performs well enough to run your sim software smoothly, it doesn’t matter much who put it together.

Finally, you need to consider what kind of strain a sim game puts on your PC hardware. For many modern PC games, the graphics processing unit, or GPU, is king. It’s what handles all the heavy lifting of making games look great. However, for driving simulators such as iRacing, Assetto Corsa Competizione, rFactor 2, etc., the CPU is also significant, as it handles the calculations to make the cars feel true-to-life.
So, when you’re selecting your PC parts, keep these kinds of things in mind as what’s often needed to play RPG or FPS games doesn’t exactly translate into what’s required for a racing sim.
What PC spec should I aim for to run iRacing or Assetto Corsa well?
Since iRacing and Assetto Corsa are among the most popular, realistic, and competitive simulators currently available, I’ll use them as a benchmark for the specs you should aim for with your new PC.
Looking at the quoted system requirements from both developers, you’ll notice a minimum, recommended, and high-end set of requirements. So, with what I just mentioned about futureproofing your PC, I strongly suggest using the recommended requirements as a baseline and the high-end if your budget allows it.
So, here are my recommendations for the minimum system requirements for a PC spec that will provide smooth gameplay with almost no compromises on the settings side, unless you’re running extremely high-resolution settings on your triple monitors:
| Operating System | Windows 10 64-Bit or higher (we use Windows 11) |
| Processor (CPU) | Intel Core i7-13700K or AMD Ryzen 7 5700X |
| Memory (RAM) | 32 GB |
| Graphics (GPU) | NVIDIA GeForce RTX 3070 or AMD Radeon RX 6700 XT* |
| Storage (HDD and SSD) | 1TB – Preferably an M.2 SSD |
Pre-Built Sim Racing PCs
If you decide you’d rather buy a ready-built PC, there are a few choices that stand out that are suitable for sim racing rigs. Going down this route is recommended if you are either unable or unwilling to build your own PC, and let’s face it, it saves you all the time involved with the building process. It’s also a great choice if you are buying a PC as a gift.
A lot of sim racers simply don’t want to build their own PC, and that’s absolutely fine! Especially if you’re looking to max out your iRacing FPS with a 3080 RTX equipped PC it might be easier to find stock from pre-built gaming PC vendors. In fact, it’s the larger PC builders who can get the stock and funnily enough they want to sell GPUs as part of a ready-built package.
The same is also true of certain CPUs and power supplies that are in high demand, so buying a PC that already has all these parts included could be the way to avoid long waiting times for parts to come back into stock.
Right now, some of the best choices include the Skytech Eclipse Gaming, MPG Velox by MSI, Skytech Prism II, MSI Codex R, and Thermaltake Glacier 360.
Of course, all of these pre-builds allow you to tailor the components to your budget but just bear in all that I’ve mentioned about futureproofing the PC when selecting the components.
Skytech Eclipse Gaming PC
Skytech is a household name when it comes to pre-built machines and the Skytech Eclipse, one of their latest additions on the market, is a must-have if you’re eyeing a top-notch gaming PC for your sim racing setup.
This powerhouse of a PC boasts an incredible flagship Intel Core i7 13700K processor from Intel’s Raptor Lake lineup and puts up an immaculate performance. Laden with 16 cores and 24 threads with a boost clock of 5.4GHz, this CPU can hold its own against very high-end gaming PCs.

Coupled with a GeForce RTX 4080 that features a whopping 16GB of GDDR6X VRAM, expect flawless gameplay in some of your favourite simulation games on 4K at blazing-fast refresh rates.
Aside from a beastly combination of this formidable duo, you’ll also get 1TB NVMe SSD Gen4, 32 gigs of DDR5 memory, and most importantly, an ATX-sized case with an effective airflow to keep the temps on the down-low.
Overall, this is a pretty decent pre-built PC that offers you a realistic racing experience, unlike anything you’ve ever had. Of course, this PC isn’t cheap but, it really is worth every penny and will stay relevant to sim racing platforms for years to come.
MPG Velox
For the best value for money, we can’t possibly overlook the mighty MPG Velox by MSI, which has the looks and power to run anyone’s socks off.
At the core of this PC, you’ll find Intel’s frontrunner from the Raptor Lake lineup, the Intel Core i9-13900KF processor that boasts a whooping 24 cores, boosting to 5.80Ghz and a total of 32 threads. Safe to say that when you’ll put this one to the test, you’ll be amazed by how much this CPU can endure.

Backed by a GeForce RTX 4070 Ti, which is a powerhouse of its own, you can expect uncapped gameplay in most graphically-demanding racing sims with real-time ray tracing on 4K displays.
In the memory department, you’ll find 32GB DDR5 RAM alongside 1TB NVMe SSD and 3TB HDD. Safe to say that this much memory in a medley with NVMe SSD would practically eliminate all sorts of loading and boot-up time.
In terms of the price, it really is a reasonable option, considering that you can hardly find a similar deal on the market. And even if you do, you’ll have to compromise on some important part of the build that’ll have a huge impact on the in-game performance of the PC.
Skytech Prism II
For our third pick of the day, we’ll again go with our friends at Skytech and advise our readers to grab the Skytech Prism II. This pre-built build rocks an excellent combination of Ryzen 7 5800X and RTX 3080 that ensures top-notch performance.
With such a build, you can expect stable 60FPS in GPU-heavy games like Forza Horizon 5 on 4K with ultra presets. If you’re eyeing a ready-made PC that offers incredible performance without breaking the bank, this is an excellent option to have.

For less than $2000, you’ll have the latest specifications that’ll truly last you at least the next 5 years. Keeping that in mind and the uncertain nature of the market, this is a pretty sweet deal to have.
Aside from all the futureproofed specifications, the stunning aesthetics make it an appealing option. The all-glass transparent build on two sides ensures a breathtaking sight and if you’re looking for something that’ll entirely transform your setup, this one comes highly recommended.
Thermaltake Glacier 360 Liquid-Cooled PC
This PC from Thermaltake is an excellent prebuilt gaming PC which would run iRacing without breaking a sweat. It’s water-cooled and loaded with RGB to make it a very aesthetically pleasing PC indeed.

Thermaltake is a very well-known and popular brand, known for their AIO coolers and PSUs, so you know it’ll have a warranty that covers everything, and price-wise, it’s good at $1600 in the US and a similar price in the UK.
MSI Codex R
The MSI Codex R is the perfect option if you don’t want to spend a great chunk on your racing sim PC. Costing just a fraction above the $1000 mark, you’ll get some of the latest specifications with this one.
In terms of specifications, you’ll find an Intel Core i5-13400F at its core in a medley with Nvidia’s latest addition to the RTX 40 series, the RTX 4060 GPU. And backed by 32GB of DDR5 memory, expect a solid gaming experience on 1080p and 1440p setups.

This PC comes with a 2TB M.2 drive that will allow you to store all of your data, and since M.2 drives can greatly enhance your PC’s speed, having this drive along with all the other components makes this PC the best in its class.
This right here is a great option if you’re aiming for 1440p because without spending too much, you’re getting the right combination of components that’ll provide an ample gaming experience.
Obviously, we can’t recommend an absolute budget build since you won’t be able to experience the racing sims the way they were meant to be played because of the inability of the PC to handle the games and maintain stable FPS and hence, this one right here is the cheapest sim racing PC setup we’d recommend.
Building a new gaming PC
While building a new PC may not be for everyone, it does have the advantage of letting you decide which parts go into the PC, which for sim racers may be of interest given the specific requirements needed for this type of gameplay.
So, if you’re a bit handy with a screwdriver and have sufficient patience, building your PC is the way to go. Plus, with services like PC Part Picker helping you figure out which components fit together, it’s never been more accessible to self-build.
If you’ve never built a PC before and would like to give it a try, I highly recommend watching this video from Linus Tech Tips. In this tutorial, he takes you the entire way through the build process, and by the end, you’ll know how to assemble your own gaming PC successfully:
As for the parts required for your futureproof sim racing PC, let’s go through our recommendations for some of the Best CPU, GPU, and Motherboard that you can buy to ensure a future-proof build that’ll serve you well in all sorts of AAA titles and racing sims.
Best CPU and Motherboard Combo
If you’ve decided to pick up the screwdriver and build your ideal sim racing PC from scratch, you’re going to need a powerful CPU and a compatible motherboard. For someone that’s stepping into the unforgiving PC market, the plethora of options available at your disposal can be quite overwhelming.
Everything from understanding the compatible socket (for example, “LGA1200”) to comparing the differences between DDR4 to DDR5, PCIe 4.0 to PCIe 5.0, and a million other things can leave you in a spiral.
And since you’ll start with the CPU, it isn’t a weary task to find one but however, finding the right motherboard is a different cup of tea. To ensure that our readers don’t spend hours researching the market for the best combination of CPU and motherboard, we took it upon ourselves to bring the best of both worlds to you.
AMD Ryzen 9 7950X3D and Gigabyte X670 Aorus Elite AX
In today’s market, the AMD Ryzen 9 7950X3D is one of the finest processors that money could buy. Even its competitors at Intel which include the likes of the Intel Core i9-13700K couldn’t come close to the performance offered by their AMD’s competitor, making AMD Ryzen 9 7950X3D the king of the hill.

If you’re going all out on your budget and want to build the fastest gaming PC, it would make a lot of sense to go with the AMD Ryzen 9 7950X3D. In terms of specifications, this CPU comes with 16 cores running 32 threads, and on top of that, it has a boost clock of a whooping 5.7GHz.
Featuring an AM5 socket, the best motherboard for this CPU we could find on the market is the Gigabyte X670 Aorus Elite AX. It is perfectly compatible with this CPU and supports it right out of the box. And in terms of specifications, the mobo comes with all sorts of bells and whistles. Handily, they sell as a bundle here.

On this ATX-sized board, you’ll find 4x M.2 slots, DDR5-supported memory slots, PCIe 5.0, and most importantly, you’ll also get WiFi 6E with this motherboard as well. Similarly, featuring a multi-layer PCB, the board ensures stable power to all components, making it the finest choice for AMD Ryzen 9 7950X3DS.
Intel Core i9-13900K and MSI PRO Z790-A
If you’re leaning towards Intel’s latest CPU lineup, we’ll save you time and tell you that the Intel Core i9-13900K is the best option out there. Of course, you can choose the Intel Core i9-13900KF variant for the iGPU but since you will be relying on a dedicated GPU, it is a wise choice to go with the non-KF version and save nearly $100 on the processor.

Featuring an LGA 1700 socket, the Intel Core i9-13900K is a high-end CPU with 24 cores and 32 threads and has a boost clock of 5.8GHz at a max TDP of a whopping 253W. To match just a beast CPU, you need a motherboard that can provide faultless power delivery and hence, we went with the ASUS TUF Z790-Plus.
It is one of the latest mobos from ASUS with the Z790 chipset and features an LGA1700 socket to support Intel 12th and 13th-gen CPUs. In terms of specifications, you’ll get support for multiple M.2 drives (Gen4), PCIe 5.0, 2.5GB LAN port, Type-C, WiFi 6E, and a plethora of other specifications.
The reason we went with this option is because of its long-range of specifications for a reasonable price. Other vendors with a similar board include the exceptional MSI PRO Z790-A another really good choice.
AMD Ryzen 5 7600X and ASUS TUF Gaming B650-PLUS
For our budget-friendly combination of CPU/Motherboard, we choose to go with AMD Ryzen 5 7600X and ASUS TUF Gaming B650-PLUS. While there’s hardly any difference between the price of the CPU and the motherboard, we decided on this combination to ensure futureproofing.

While you can save some of your budget by going with the slightly cheaper motherboard, you will be compromising on some features like additional M.2 slots, PCIe 5.0 support and in some cases, you might not even get support for DDR5 memory.
Keeping all these things in mind, we decided to go with this combo. In terms of specifications and performance, the AMD Ryzen 5 7600X is a mid-tier CPU with excellent gaming capabilities, and as for the motherboard, you’ll get all the bells and whistles here including WiFi 6, PCIe 5.0, DDR5 RAM slots, and much more.
Best Graphics Cards – Brief Guide
After the CPU and motherboard, the GPU is the most essential part of the build since it will do all the heavy lifting in the graphics department and crunch the numbers in those benchmark tests.
Furthermore, we have already covered the Best Graphics Cards for Gaming & Sim Racing in another section of our blog but here’s a brief guide on a few options that you can consider for your build.
ZOTAC Gaming GeForce RTX 4090
If you’re going all out on your GPU, we highly recommended the ZOTAC Gaming GeForce RTX 4090. It is a beast of a GPU and can handle everything you throw at it without breaking a sweat.

Featuring 24GB of GDDR6X with a 384-bit memory interface, this is the fastest GPU that money can buy. And while we’re on the topic, do keep in mind that this GPU costs a fortune.
But since we’re using this in our racing sim, we can vouch for the card and tell you that its top-notch performance is worthy of your every single hard-earned penny.
XFX Speedster AMD Radeon RX 7900XTX
If you want to save some cash and get the best value for money, we recommend the mighty XFX Speedster AMD Radeon RX 7900XTX. It is the best GPU from AMD and features a whooping 24GB of VRAM. Compared to RTX 4090, the RX 7900XTX isn’t too far off when it comes to benchmarks in graphically-demanding games.

Although, you will have to compromise a bit on the visuals since the real-time ray tracing here isn’t as great as RTX 4090.
Regardless, it is a pretty decent option, especially if you’re building an all-AMD build and have a monitor that natively supports FreeSync especially if you’re aiming for 4K gaming.
ASUS TUF Gaming NVIDIA GeForce RTX 4070 OC
For the budget option, we went ahead with the RTX 4070 OC from Asus. In terms of specification, you’ll get 12GB of VRAM with this one and NVIDIA’s latest ray-tracing abilities which ensure a realistic experience.

Pair it up with a decent CPU and you can expect spectacular gameplay on 1440p and 4K displays. But since the GPU is mid-tier, you’re better off investing in this one if you’re aiming for 1440p since 4K can be a bit overwhelming for this particular device.
Overall, a pretty decent GPU for the price and if you’re looking to enjoy AAA titles or play your favourite gaming simulations without breaking the bank, this one comes highly recommended.
Our sim racing PC build: specification
As I mentioned in the intro to this article, we’ve recently put together an amazing new gaming PC to hopefully, futureproof our sim racing efforts for a few years:

The brief was put together during a heatwave here in the UK, so, as you might imagine, cooling was a huge priority. I’ve also noticed that new GPUs are so power-hungry – the recommended minimum PSU rating for an NVIDIA 3090 RTX is around 850 watts. So it stands to reason that when NVIDIA releases their 40 series GPU range, we might be looking at closer to a minimum power requirement of 1kw. Who knows, but having had to upgrade the PSU in an older gaming PC, it’s really not an experience I’d care to repeat for a while.
On that note, I’ve put a 1200w PSU in this build.
Case: CORSAIR 7000D AIRFLOW Full-Tower ATX PC Case
When it comes to housing the components inside your PC, the more space you have for future expansion, the better. More space also means better cooling (note my comments about the heatwave earlier). I really like this new case from Corsair – it is absolutely huge as a full tower case which means it has fantastic cooling potential.

There are 3 large fans in total (one at the rear and two at the front) with enough space inside for two huge GPUs.

A word of caution, this case is super heavy! I found myself moving it into position by sliding it around on my office floor on a towel!
Motherboard: MSI MPG Z590 GAMING CARBON WIFI
Choosing a cutting-edge motherboard will allow you to attach the best and most up-to-date components, so I chose the MPG Z590 GAMING CARBON WIFI motherboard which features multiple PCIe 4.0 slots allowing for the best performance from other crucial components, especially the 3090 GPU.
I chose this motherboard because, for the spec, it’s a really reasonable price and it’s rated as one of the best motherboards you can buy for gaming:

Complimenting the motherboard, I added an Intel Core i9-11900K and some Corsair Vengeance RGB PRO SL 32GB (4x8GB) DDR4 DRAMs:
SSD: Samsung 980 PRO PCIe 4.0 NVMe SSD 1TB
I’m a fan of Samsung’s super-fast SSD and with the full support offered by the MSI motherboard, I couldn’t really resist the 980 Pro.

You might remember I did a walkthrough of upgrading a gaming PC to a slightly earlier version of this SSD so check out that tutorial if you want to clone your old hard drive to SSD.
Gone are the days where SSDs are too unreliable to be the main disk of a gaming PC – if you want the fastest possible boot and load times, then an NVME SSD that runs on PCIE 4.0 is the way to go. Another good reason to justify the investment in the MSI motherboard!
Cooling: CORSAIR iCUE H150i RGB PRO XT Liquid CPU Cooler
With the bigger case came the opportunity for a bigger liquid CPU cooler. At a very reasonable price point comes the Corsair iCue H150i – if you want even more RGB lighting oozing out of your case, go for it. I’ve always owned Corsair coolers – it just feels like I can really trust them. This particular one doesn’t let the CPU get much over 60c even under heavy loads.

GPU: RTX 4090
Just out of curiosity, I added a Zotac 4090 GPU, which as you would expect handles sim racing games without breaking a sweat (here’s the GPU testing for that).
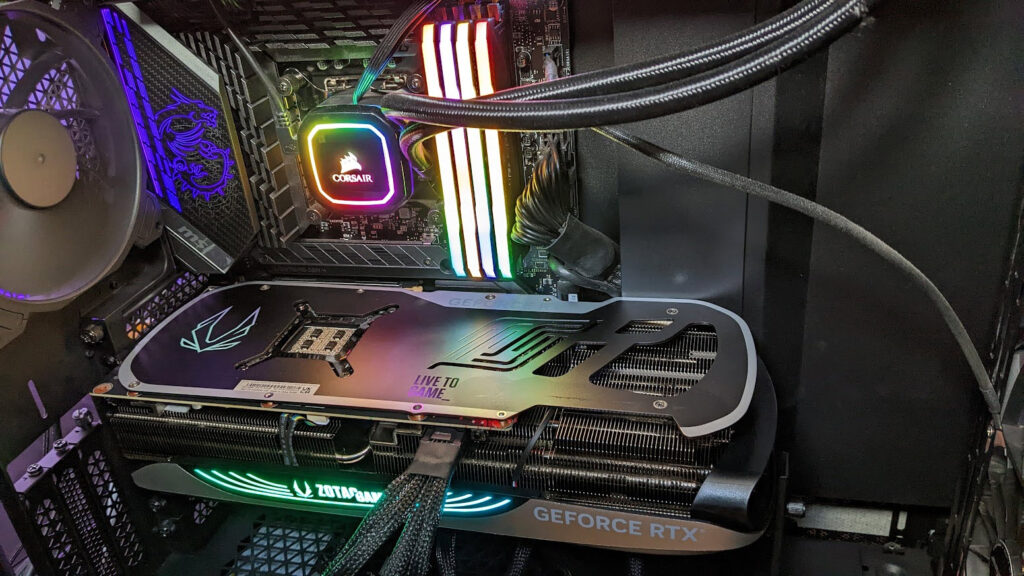
The 4090 runs so much cooler than its 30 series brethren. However – until iRacing updates its graphics engine, a 4090 is overkill. If, on the other hand, you’re maxed out on your Assetto Corsa Competizione graphics settings, a 4090 will be an astonishingly powerful improvement and set you up for many, many years to come.